Before you get started, let’s talk a little bit about why creating your own avatar on Facebook has taken off. Everyone is sitting at home looking for something fun to do. What could be more engaging than creating a digital version of yourself? For those of us who are old enough to have seen the movie avatar, this exercise is especially nostalgic.
Certainly if Facebook wanted to, they could have simply had you upload a picture of yourself and then utilize technology to digitally create avatars for everyone. Or, they could have automatically created an avatar for you based on your most recent Facebook profile picture. Instead, they went old school and had everyone go through the process of creating an avatar themselves.
This product decision created a greater sense of ownership and interest. However, this presents the key challenge when creating an avatar that looks like you - you have to be honest.
For this project, this doesn’t mean creating an avatar that looks like you would like to look. Instead, it means making an avatar that looks like you. To help guide you along this path, Facebook has a button in the corner that you can click on that will enable you to open your front facing camera while you are making your avatar.
While this is potentially helpful, I think it’s better to pull up a picture of yourself to use as a reference that you can go back & forth between. Most people when they are looking in a mirror are skilled at identifying what they don't like. And, depending on how you are feeling when making your avatar, you might not be at your best. So, let's avoid all that internal judgement and just use an awesome picture of yourself for this project.
Without further ado, let’s get started.
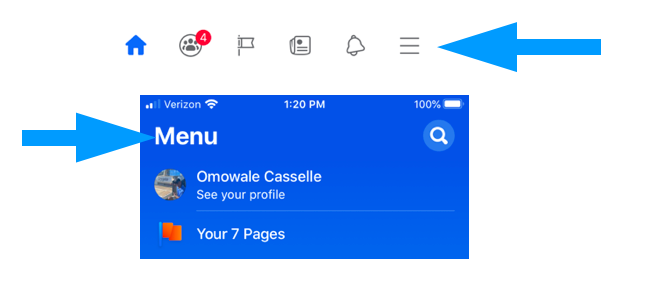
1. Open the Facebook app on your smartphone and tap the three stacked lines to pull up the Menu (lower right corner for iPhone and in the upper right corner for Android).
2. Scroll down and tap See More.
3. Select Avatars.
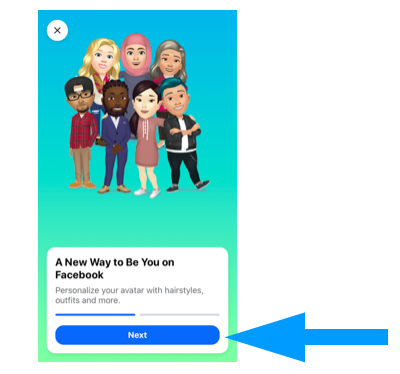
4. Tap Next and then Get Started.
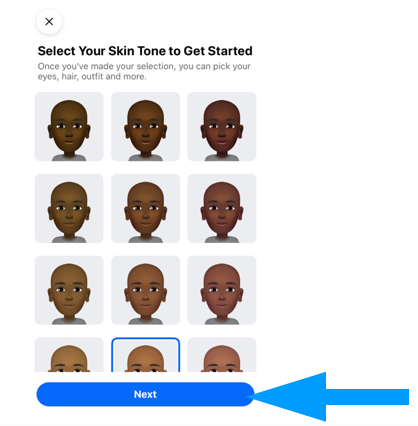
5. Select your Skin Tone and tap Next.
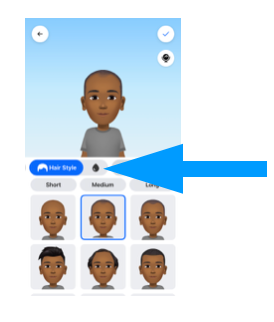
6. You'll then be instructed to choose a Hair Style for your avatar. You can select Short, Medium or Long for a variety of styles. Once you've made your selection, tap the Color icon.
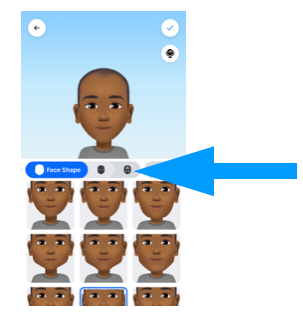
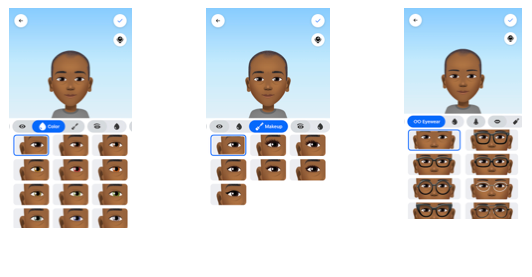
7. Next, you'll move on to your avatar's Face icon, where you'll select the Face Shape, Complexion and Face Lines (nice way of saying wrinkles - well done Facebook). 8. After you've customized the Face, tap the Eye icon. Select an Eye Shape, Color and Lash Length. Then move on to the Eyebrows icon and select the Eyebrow Shape and Eyebrow Color. You can also add Glasses.
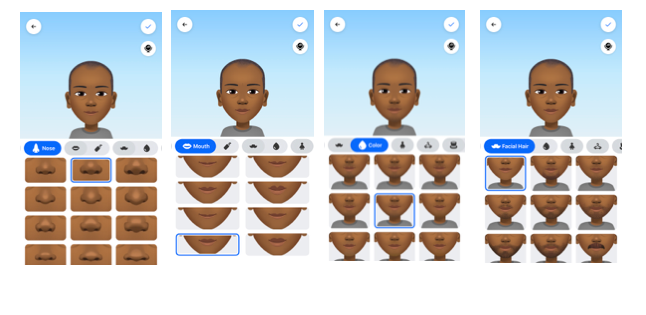
9. Now it's time to customize the Nose and Mouth. Select your Nose Shape and then move on to your Lips Shape. You can also add a Lip Color and Facial Hair.
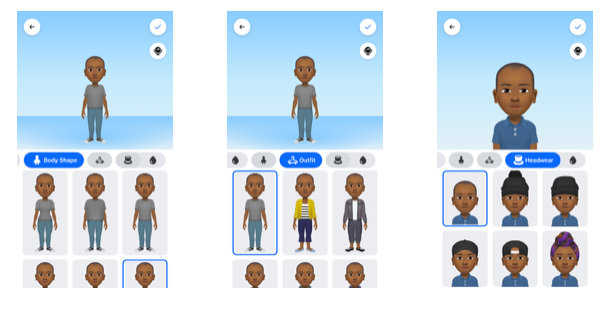
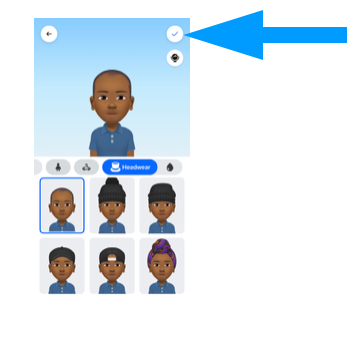
10. Next, select a Body Shape. Once you do this, you can choose an Outfit that you like best. You can also choose to add a Headwear which includes a hat, scarf or even cat ears to your avatar's outfit.
11. Once you're finished customizing your avatar, tap the check mark icon in the upper right corner. Tap Next and then Done.
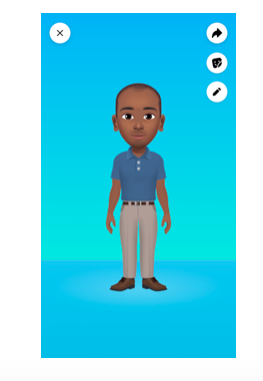
When you want to use it, you can access the avatar you made by tapping the smiley face icon in the Write a comment section of Facebook. So, how did you do? Do you think your avatar looks like you? Make sure you share on Facebook so your friends can give you feedback. Hope you enjoyed!
Join our growing community!
Sign up to receive the latest news, special offers, & updates about Digital Adventures.
We respect your privacy and do not tolerate spam. We will never sell, rent or give away your personal information to any third party.
About the Author: Omowale Casselle is the Co-Founder & CEO of Digital Adventures.


 By:
By: